What are webhooks?
A webhook is an HTTP request, triggered by an event in a source system and sent to a destination system, often with a payload of data.
How to configure your webhook endpoint?
- Login to Digio Enterprise Dashboard using the link below:
- Sandbox URL: https://ext-enterprise.digio.in
- Production URL: https://enterprise.digio.in
- Navigate to the Profile section:
- Click on the upper right-hand corner and select the Profile section.
- Configure Webhooks:
- Click on the Webhooks section to manage your webhook settings.
Introduction of Webhook Group/Queue
We have introduced the concept of Webhook Groups, which can also be interpreted as webhook queues, allowing users to organize their webhooks more effectively. Unlike the previous setup, where all events were considered in a single user queue, users can now create multiple queues, each with its own unique group name, group URL, and group secret.
Group-Specific Configuration
Every Webhook Group has its own dedicated URL (or endpoint) and secret, providing isolated configuration settings that can be edited later. This means that any changes or failures in one group will not impact other groups, ensuring better reliability and resilience.
Webhook Group List
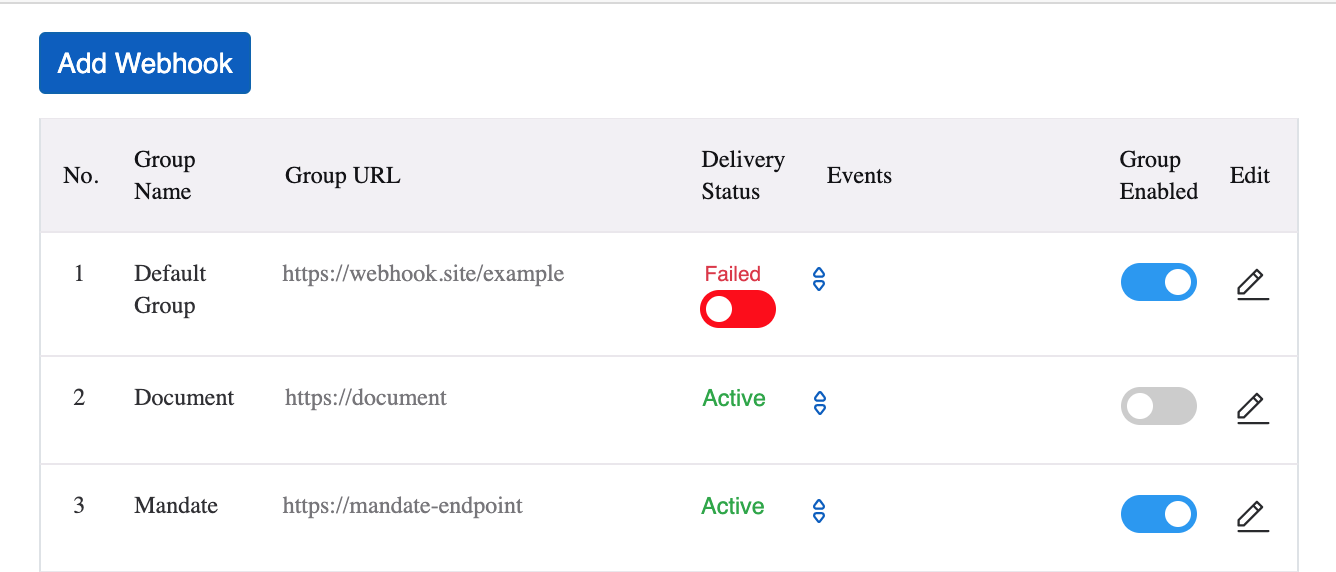
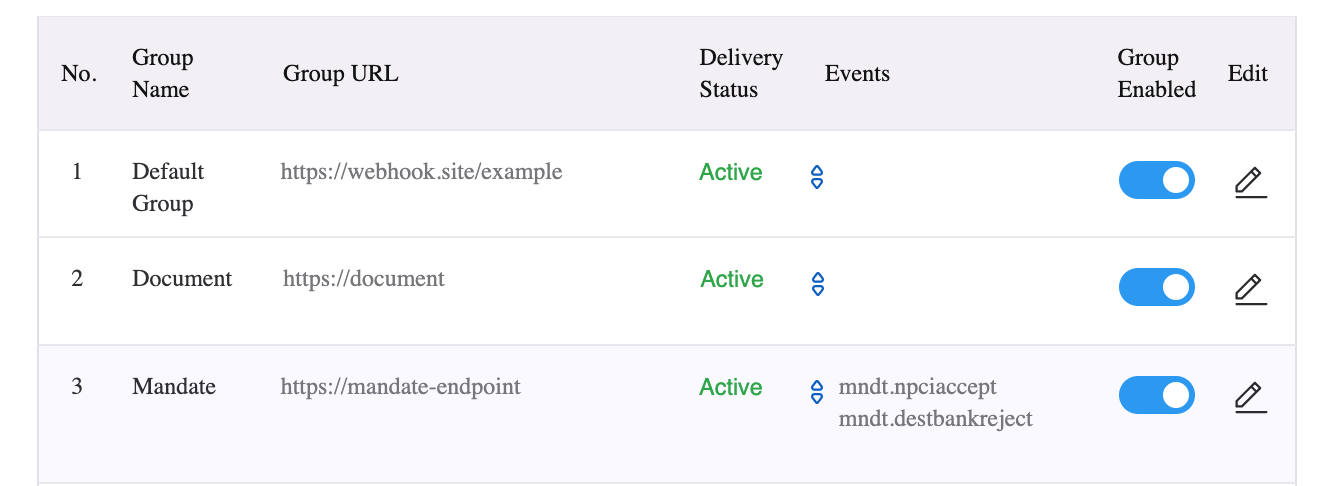
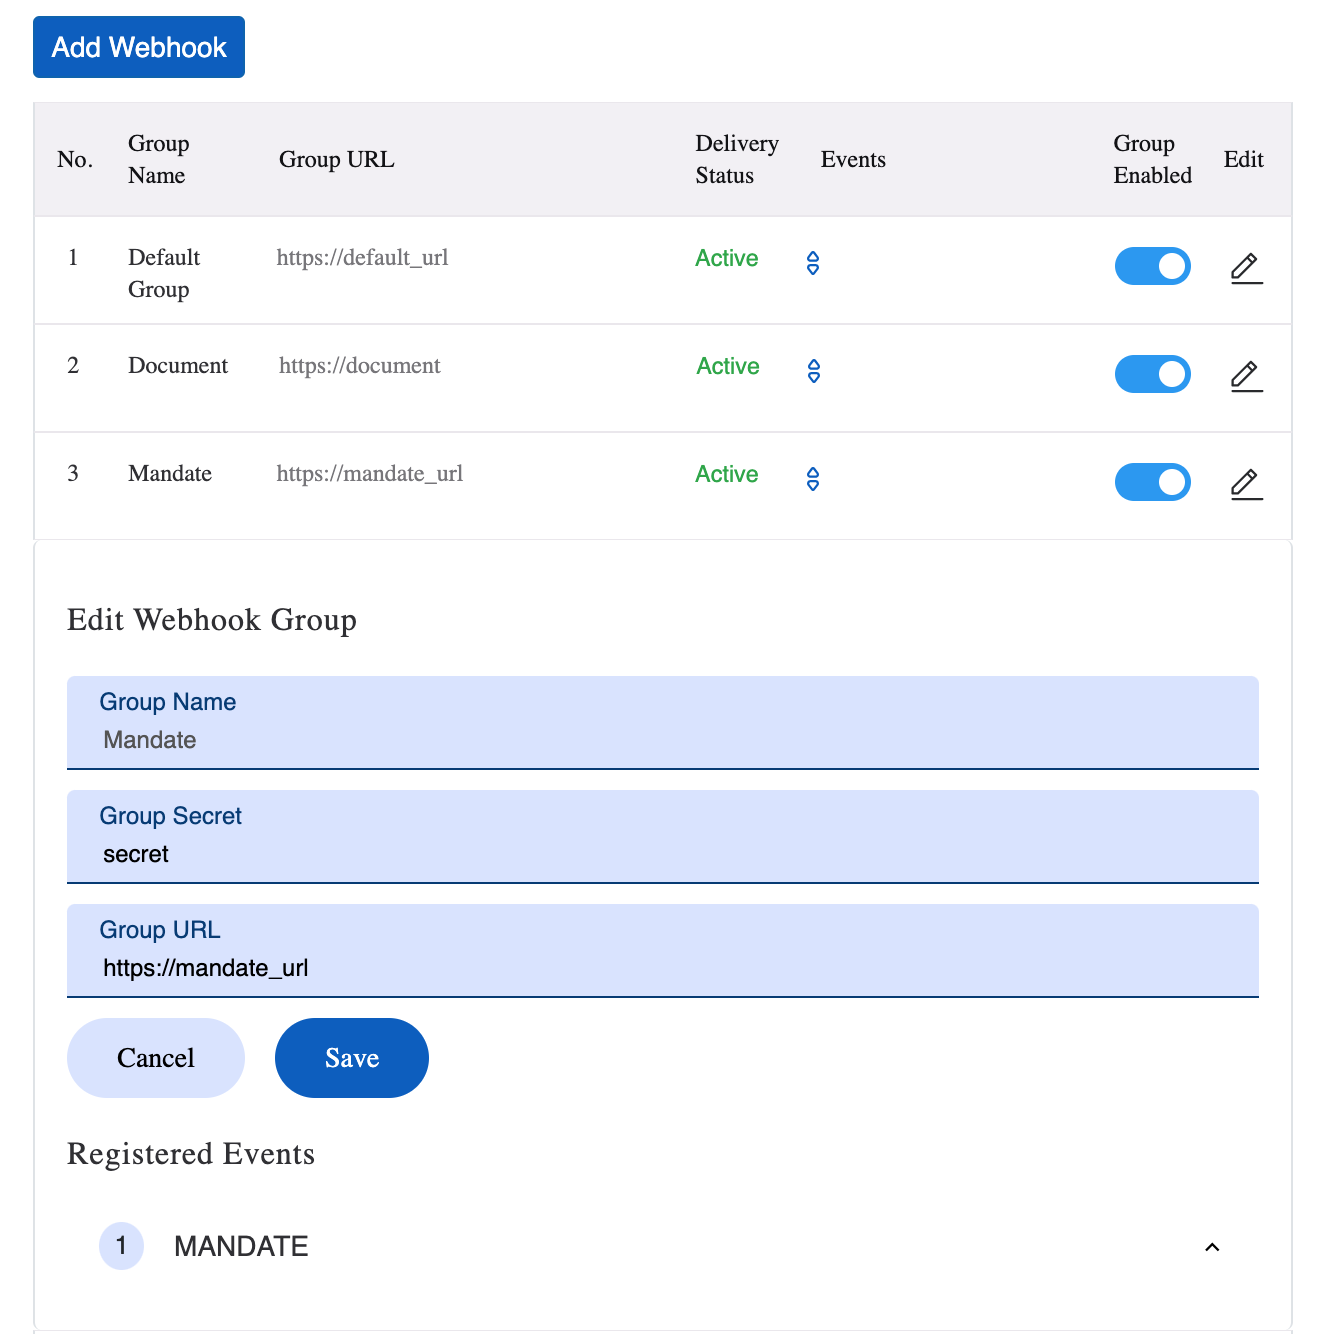
The new webhook group table will have the following details:
- Group Name: As entered by the user.
- Group URL: As entered by the user.
- Events: List of active events in that group.
- Delivery Status: Indicates whether the Group URL mentioned is working fine and whether we are able to communicate with it.
- Active: URL is active and working fine.
- Failed: Group has been marked as failed due to communication issues with the endpoint. This can be reset with the toggle option. Ensure that the endpoint is correct before resetting.
- Group Enabled: User-controlled status of the group, indicating whether the group is active or inactive.
- Edit: Button to open the Group Edit Screen.
Note: A Default Webhook Group will be present if webhooks have been activated.
Edit Webhook Group
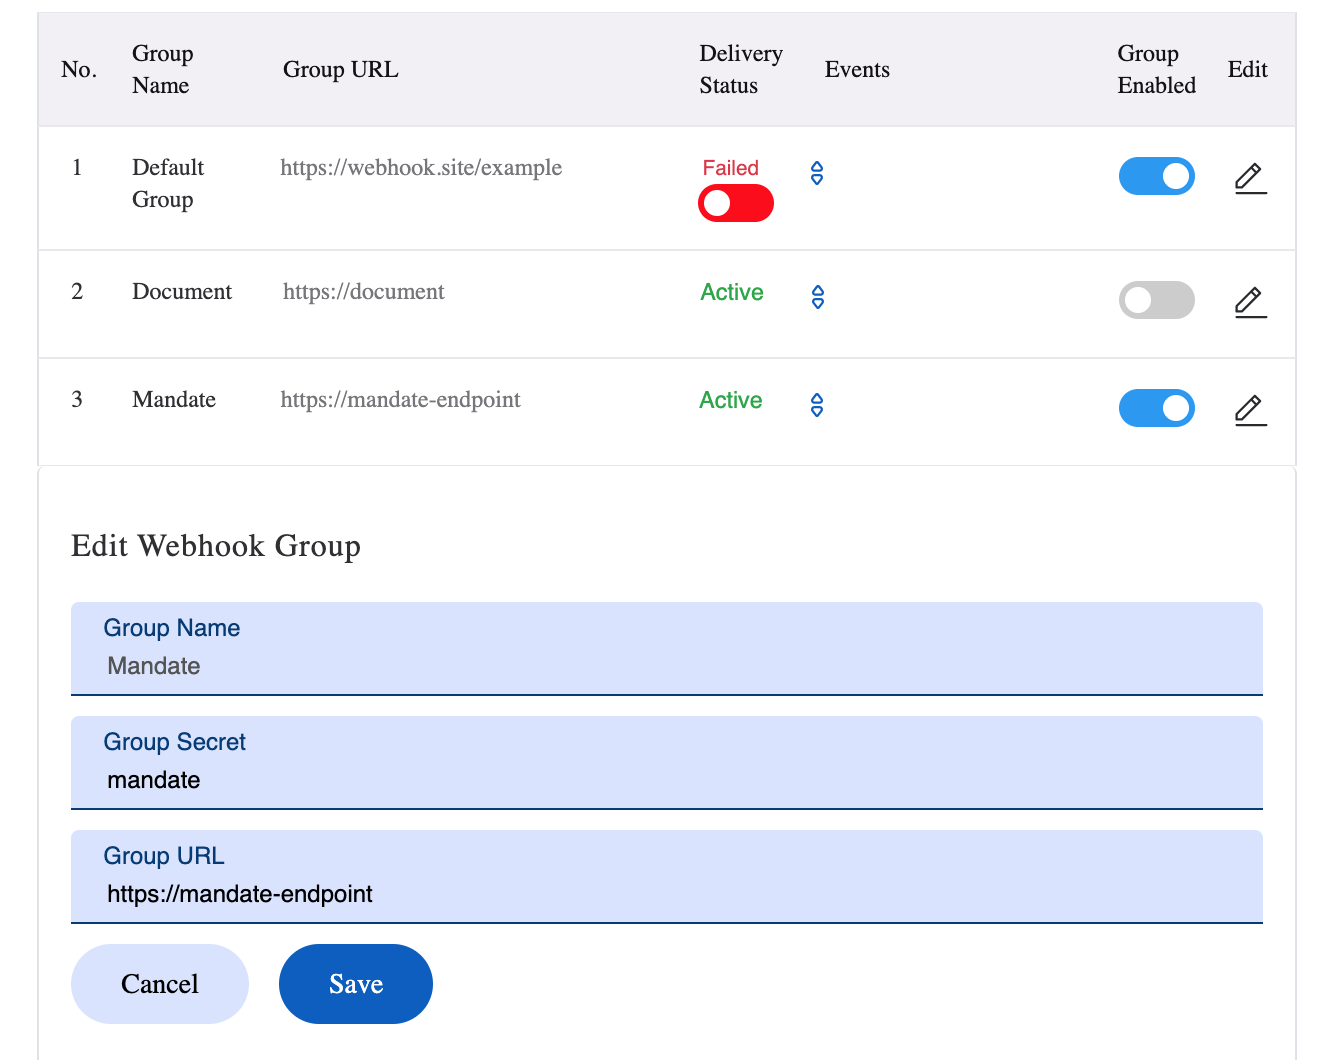
This allows users to modify any group-level details:
- Group Secret and Group URL can be modified, while Group Name is immutable.
- Users can activate/deactivate events from here.
- Users can migrate webhook products from the current group to another group.
Note: The Group URL of the Default Webhook Group cannot be edited.
Concept of Webhook Events
Webhook events can now be grouped at a product level. For example, events such as mndt.tranfail, mndt.transuccess, mndt.npcireject, and mndt.npciaccept belong to a single webhook product named MANDATE. Users can manage individual events within a group, including the ability to activate and deactivate events.
Steps to activate/deactivate a particular event
Step 1: Click on the Edit button of the webhook group containing the event.
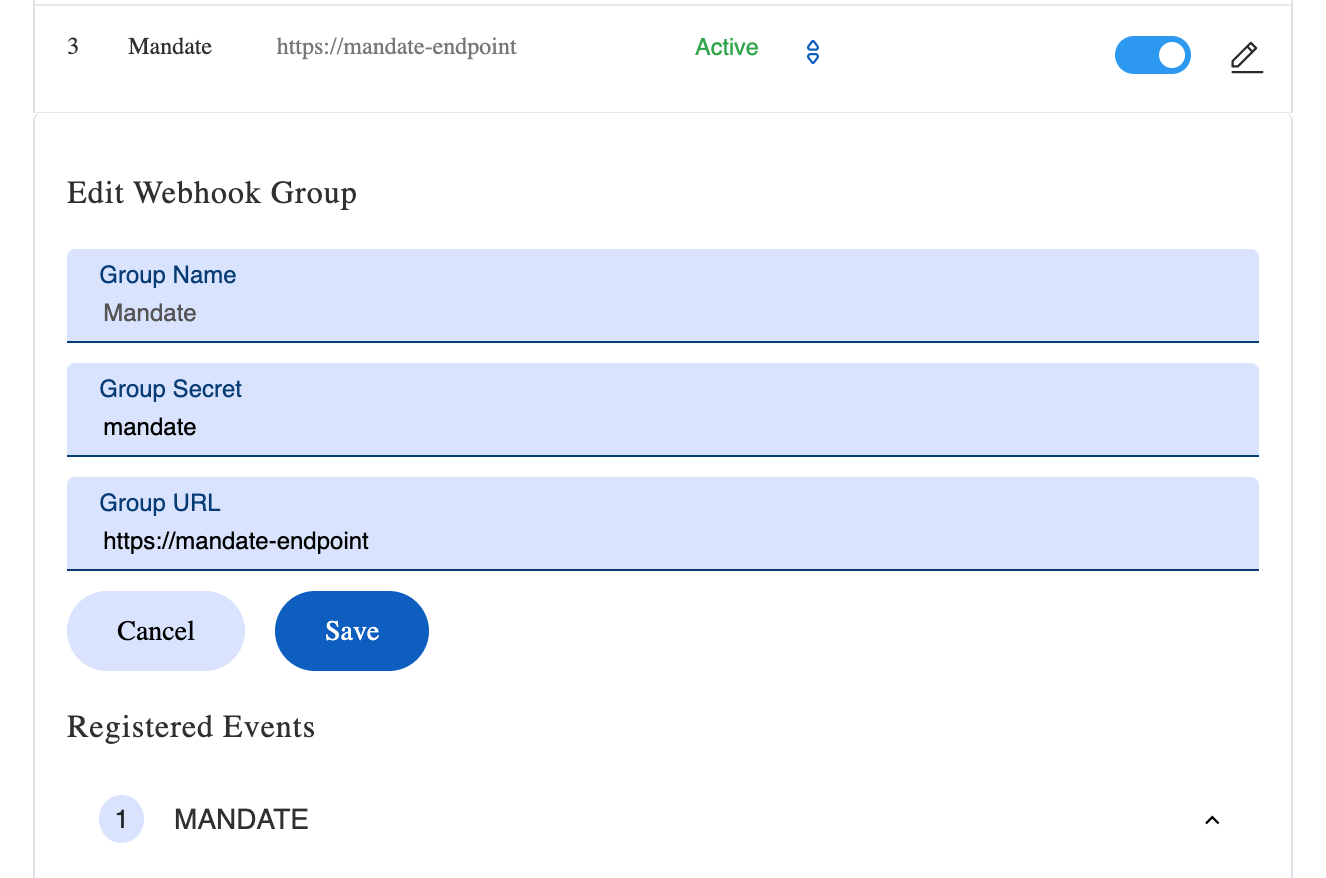
Step 2: Click on the associated webhook product and tick/untick the checkbox to activate/deactivate that particular event.
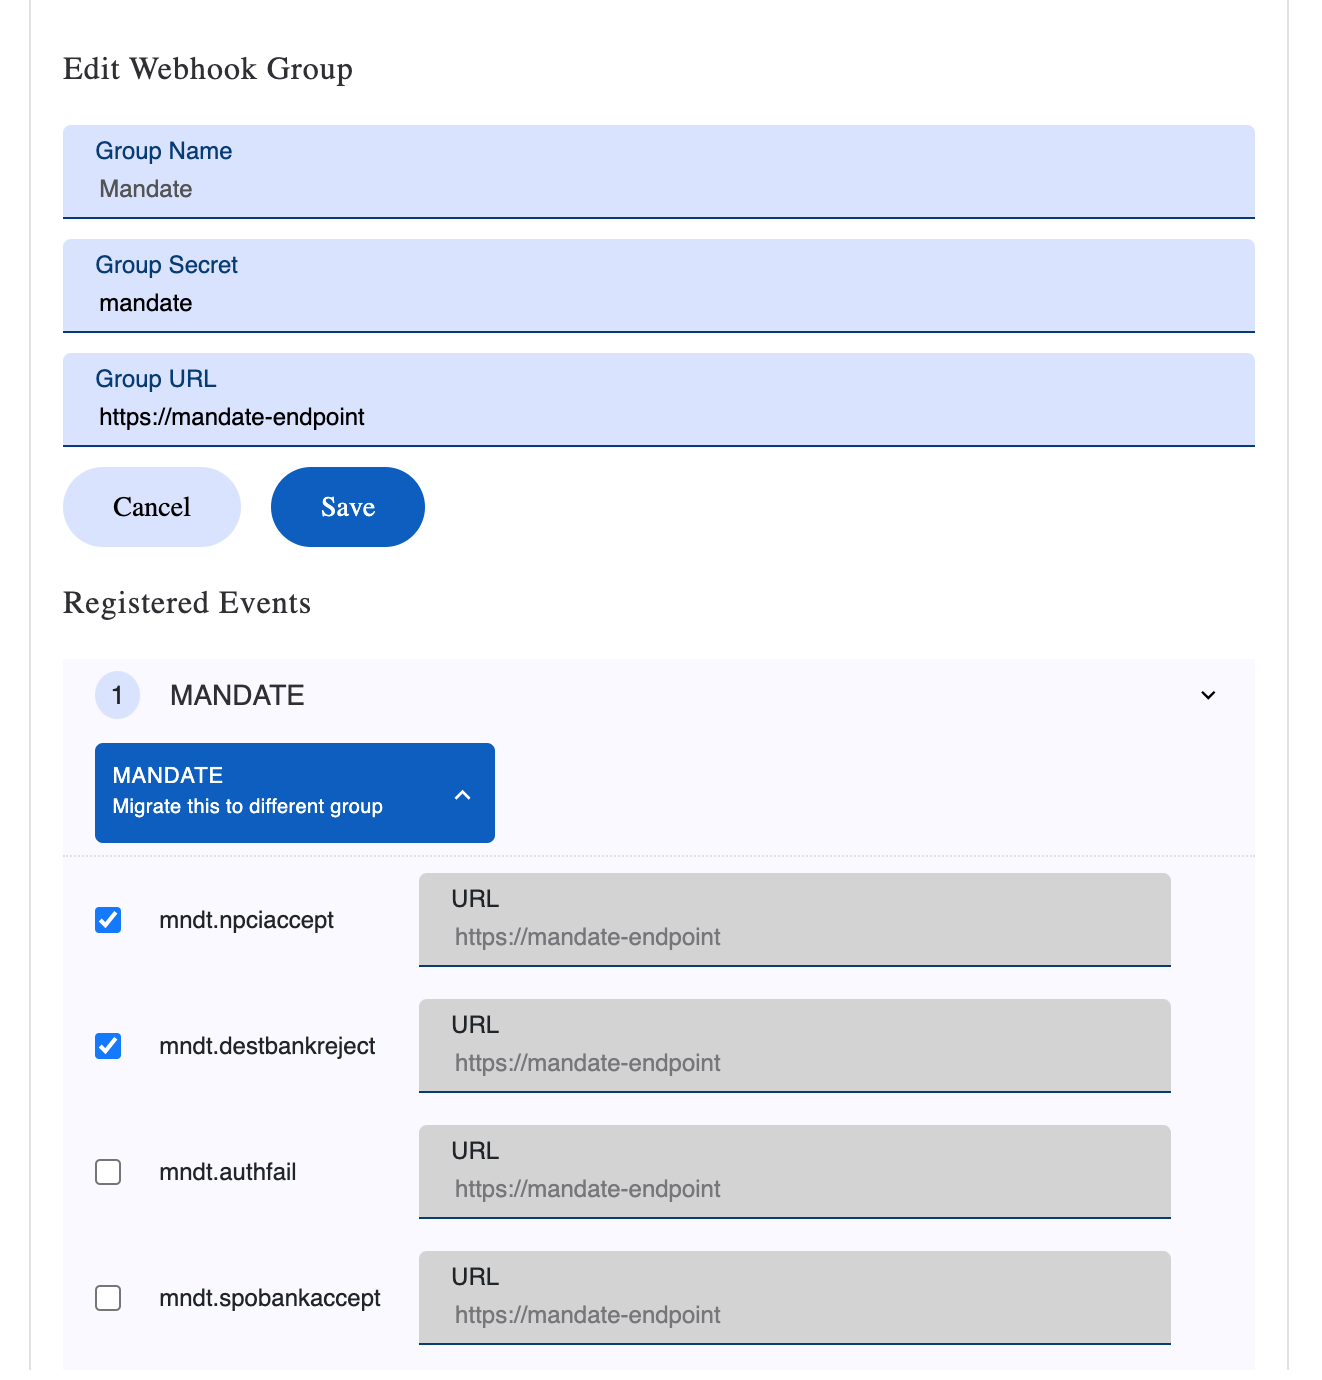
Step 3: Click on the Save button. All the activated events will appear in the events column.
Concept of ‘Default’ Group
The Default Group is the first and primary webhook group that is generated upon activating webhooks.
Upon activating the webhook option through the 'Configure Webhook' button for the first time, a Default Group will be automatically created for the user. Users who have never activated webhooks need to configure them for the first time. This will create a Default Group with all the webhook events.
Step 1: Click on the Configure Webhook button under the Webhook title in the Profile Page.

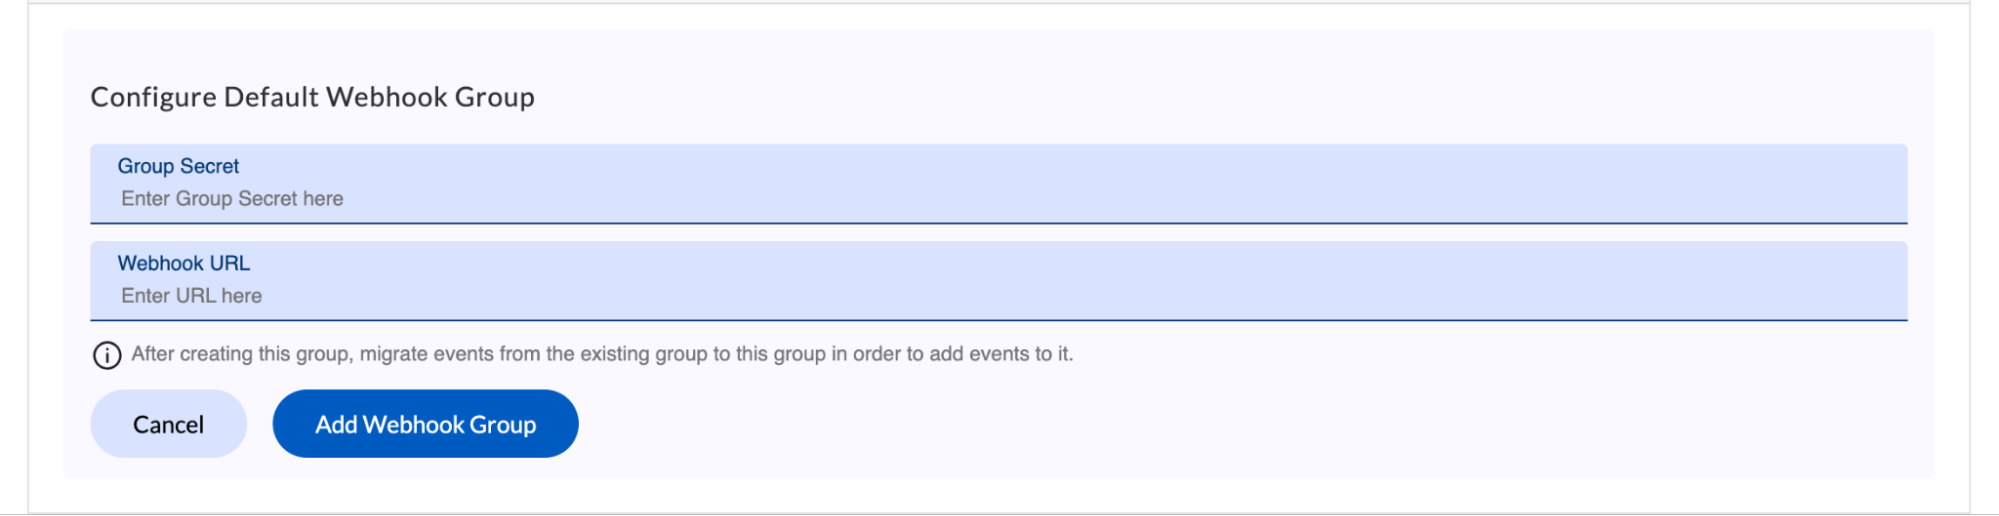
Step 2: Enter the URL and the secret, then click on Activate Webhook.
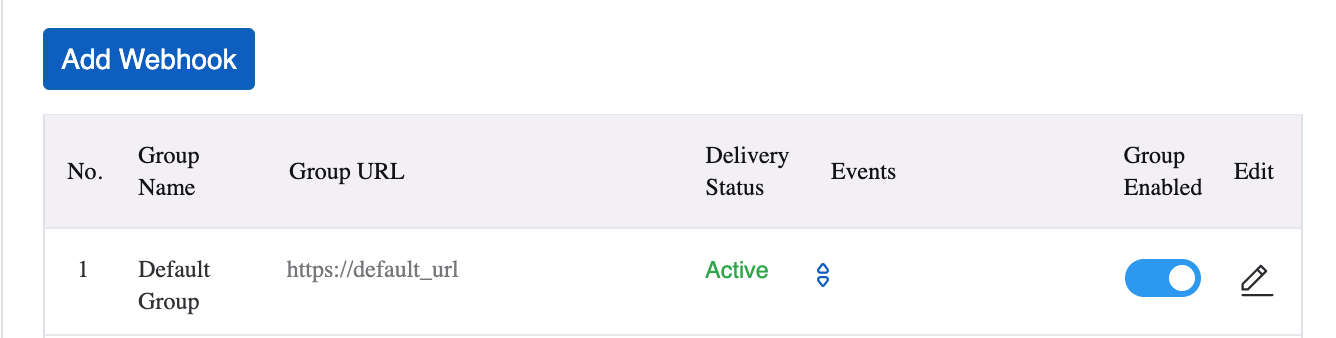
The Default Group for the user is created:
Migration of Webhook Product
Each product can only exist in one group at a time. We have introduced a seamless migration feature that allows you to move a webhook product along with all its associated events from one group to another. Migration of a singular event from one group to another is not possible. Webhook product migration can be performed between any two webhook groups. Webhook Groups must be active before migrating any webhooks into them.
- On deactivating a webhook group, all its webhook products will migrate back to the Default Group.
- While migrating the product to a given group, all the events of the webhook product will have their endpoints the same as that group URL.
- Migration is possible only at the product level, so migrating a single event from one group to another is not possible.
Steps for Migrating a Webhook Product to a new Webhook Group
Step 1: Create a new Webhook Group with a group name (mandatory), Group secret (optional), and group URL (mandatory).
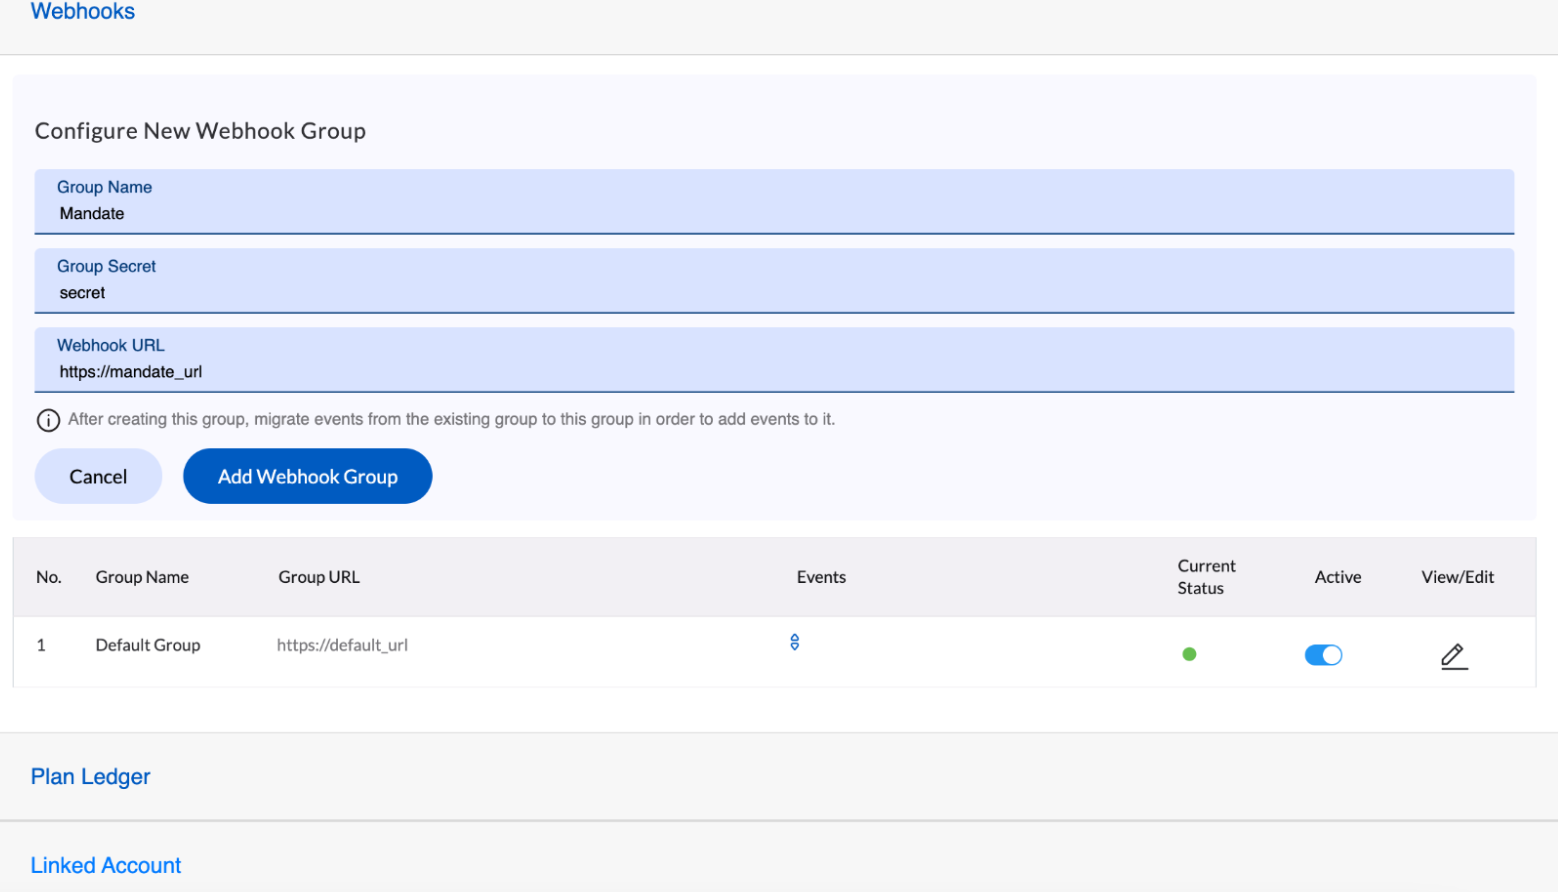
Step 2: Click on the edit option of the group where the webhook product is already present. (In this case, we are migrating MANDATE from Default to Mandate group.)
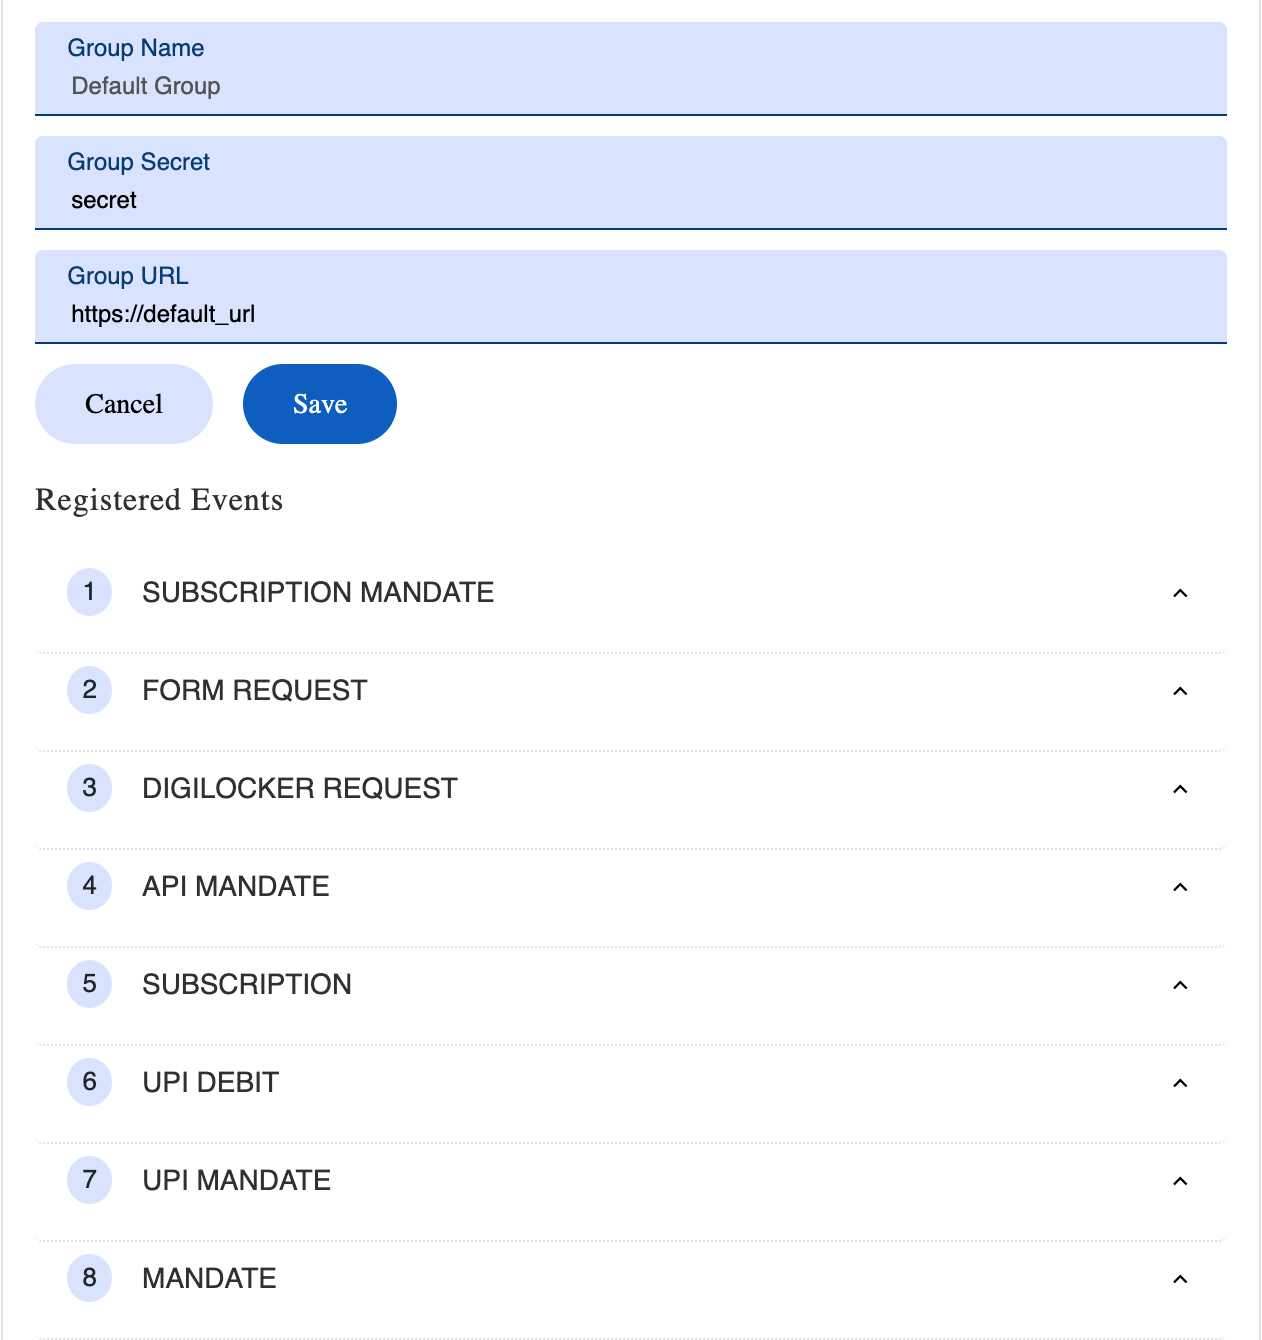
Step 3: Click on the Webhook Product that you want to migrate.
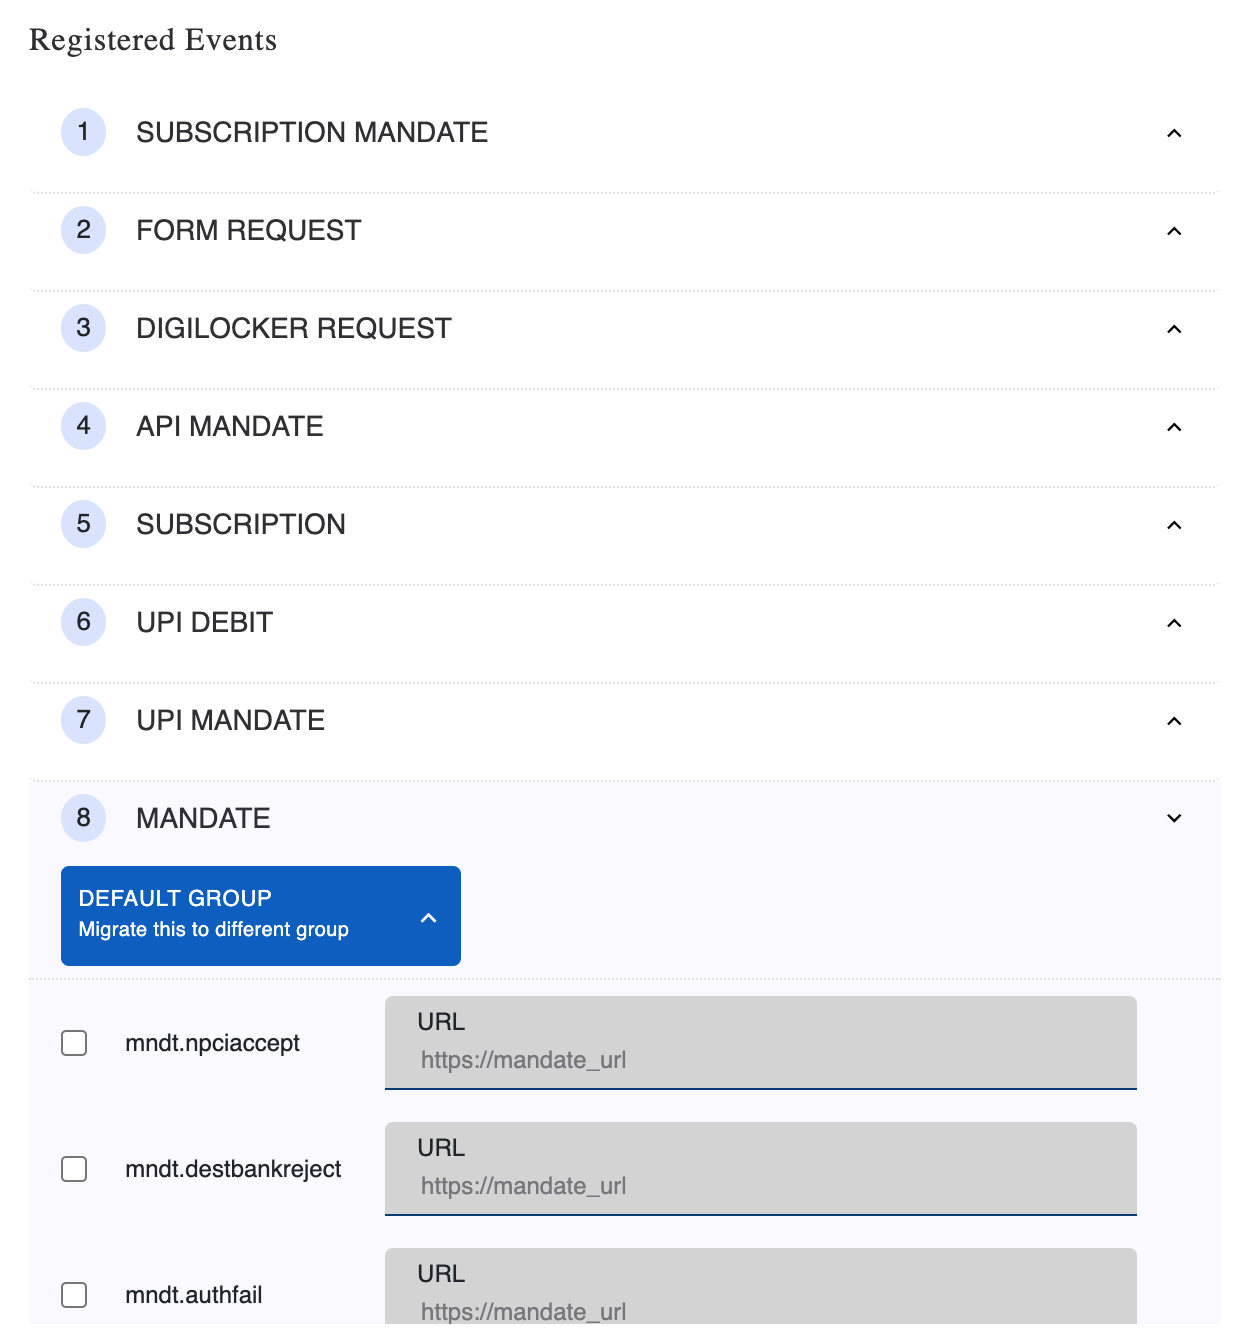
Step 4: Click on the Migrate button and select the group to which you want to migrate. (In this case, we are selecting Mandate from the dropdown.)
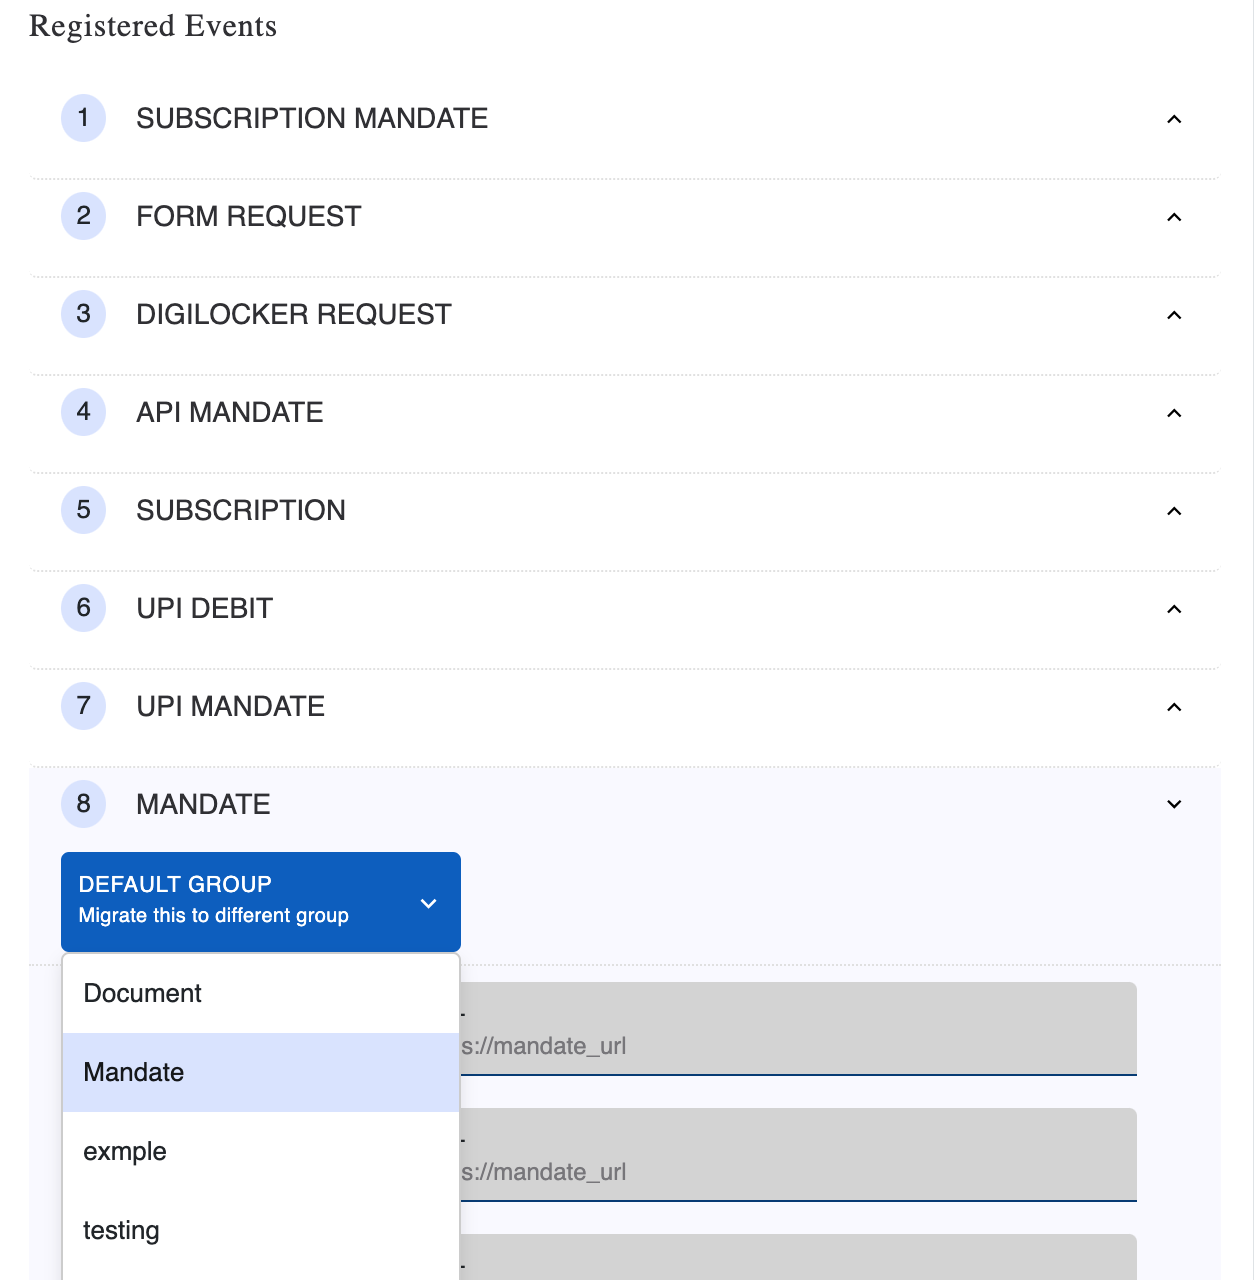
Step 5: A popup will appear with the message that all the events in the MANDATE webhook product will also migrate. Click on Confirm.
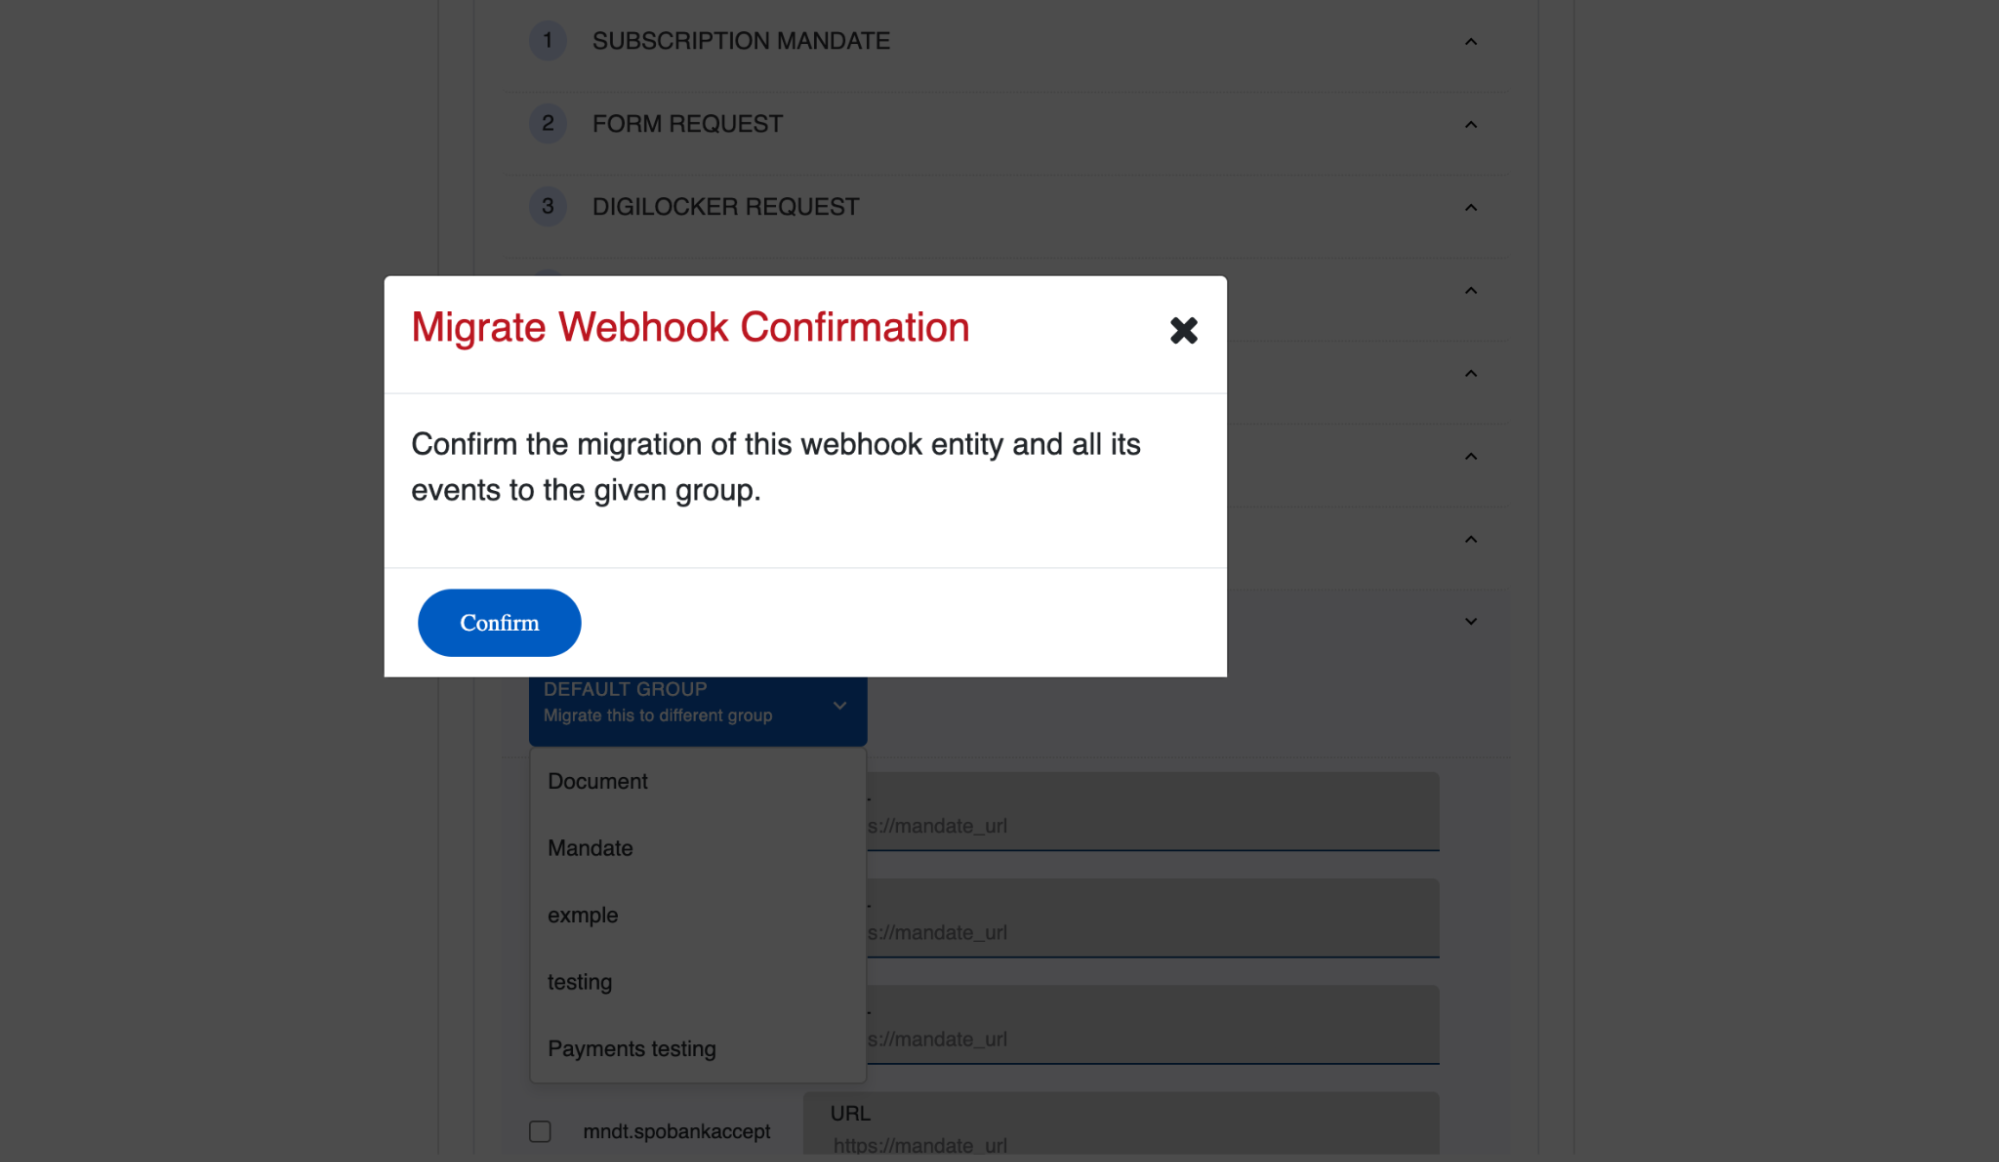
Step 6: You can now see the MANDATE webhook product in the Mandate group.
How It Works?
We send webhook notification as a HTTP POST request with a well-defined JSON payload on the provided endpoint URL.
Webhook events are treated to be successful if the endpoint URL responds with 200 OK Response within 10 seconds.
In case of failure, there will be 5 attempts in the first hour and then 24 attempts every hour to process a webhook notification. If all attempts fail, processing of webhook notifications will be paused for the account.
Reference: