How to generate request(s) on the template/document?
Approach 1: Individual Requests
-
In the custom template section, users can see all the saved templates along with the option to Generate Document against the templates having at least 1 signer.
- In case of “No Signers” assigned on a given document, users can follow the steps mentioned in the previous section to set up fields and proceed without setting signers.
-
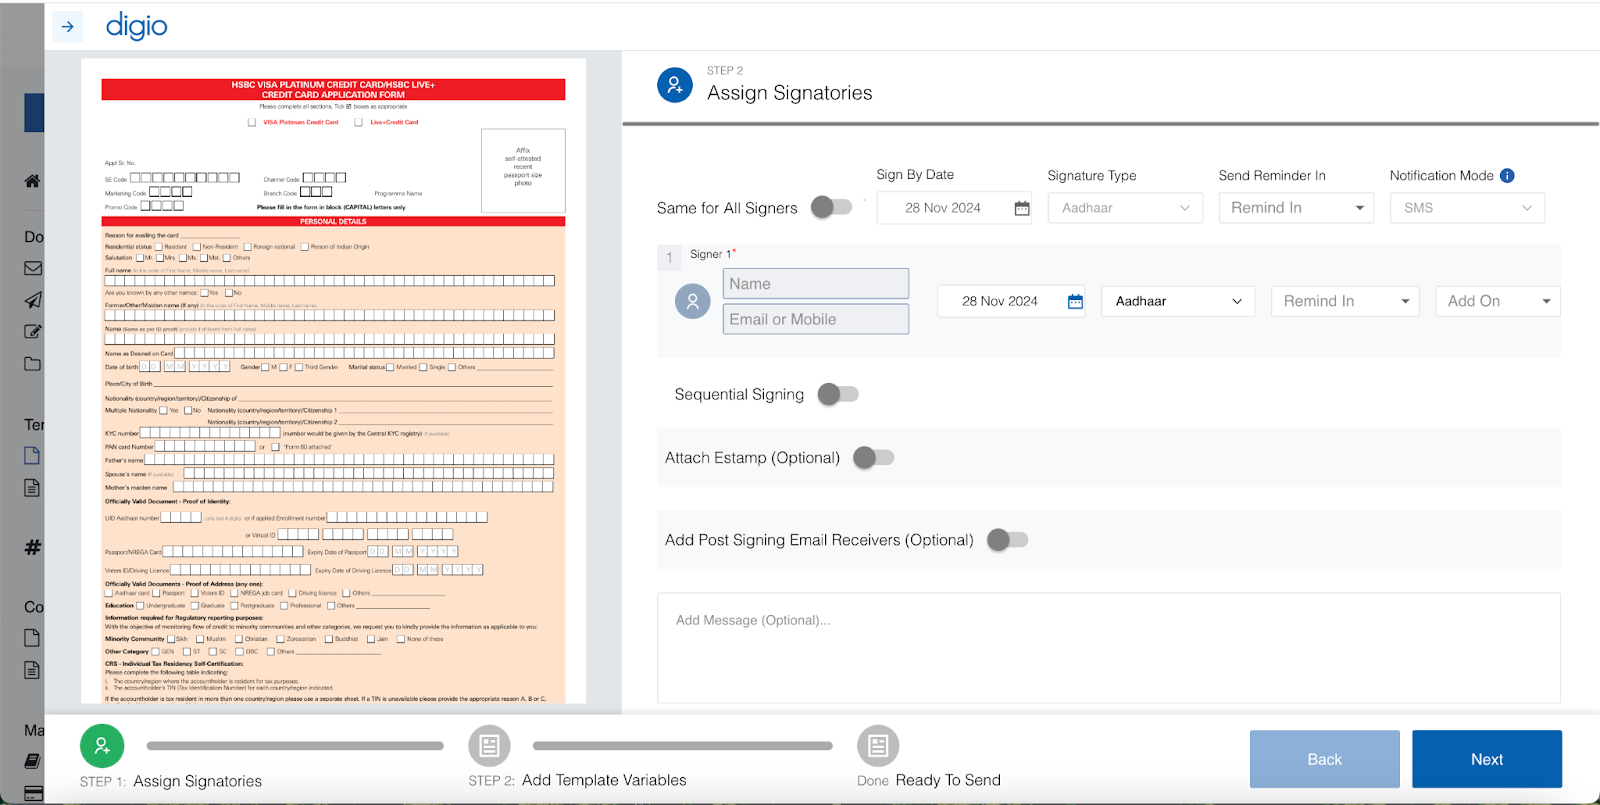
Users can then enter details for the signer(s) like: Name and Email ID/Mobile Number, Sign Type(Aadhaar, Electronic, Electronic Certified, DSC and Review) and Sign by Date.
- The Email ID/Mobile Number shared by the user will be used to send the link to sign the document.
- Users can also choose to set reminders to be sent to signers.
- Users can also choose Sign by Date, Sign Type and Reminder to be global settings to be applied across signers.
-
The various supported sign types are as below:
- Aadhaar
- OTP
- Biometric(Fingerprint)
- Face
- Iris
-
NOTE : The OTP mode can be used across the dashboard and SDK whereas the Biometric(Fingerprint) can only be used from the dashboard of the person sending the request which means for the request which has gone out, if biometric signing needs to happen, it cannot be from the request sent to the customer. Iris and Face modes are supported over the SDK only.
- Electronic
- Slate
- Text type
- Initials
- QR Code
- Electronic Certified
- In extension to above, Digio will certify the signing process/signature
- DSC
- This is a token based signing which has the signature stored securely and can be accessed only with a password
- Review
- In case you don’t need a signature and only wish to get the document reviewed
Please refer to DigiSign for more information - Electronic
-
Once details are added, users can choose to have Sequential Signing.
- If chosen, users can reorder signers in the order of signing.
- By default, requests will be sent parallelly to different signers.

-
Users will also have the option to attach e-Stamps to the document.
- If chosen, users will be able to select stamps from the inventory.

-
Last but not the least, users can also add post signing email receivers to choose additional recipients to receive the signed document along with the option to pass an optional message if they wish to do so.
-
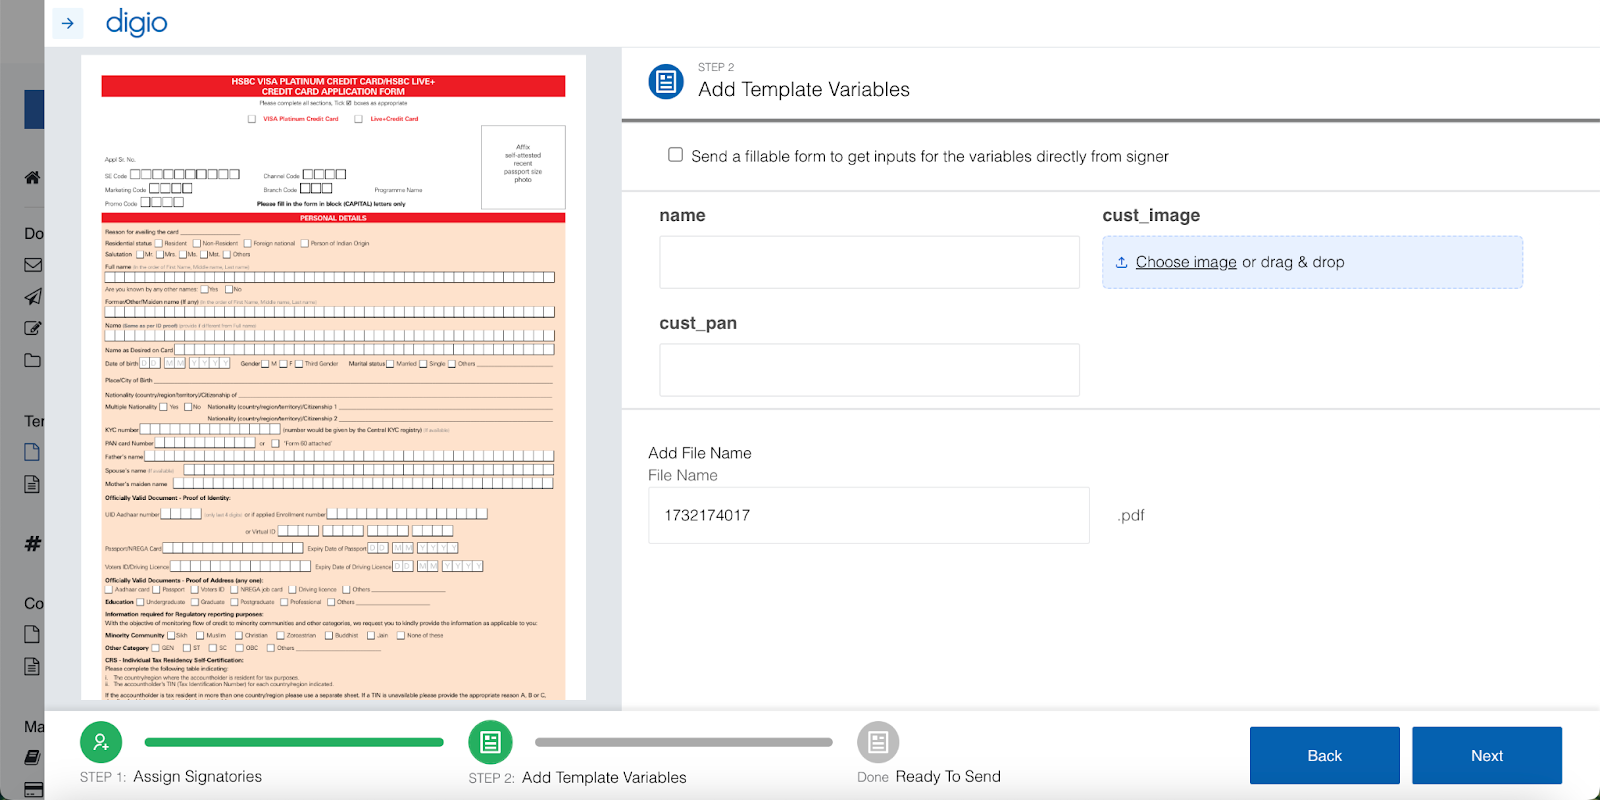
Once all settings are complete, users click on next to move to the next section to Add values for the variables or choose to send to end customers to be filled by them(Fillable Form).
- In case of any mandatory/hidden parameter that may be present, users will have the option to preset the same here.
- If neither the values are added nor the option to send the document to the end customer as a fillable form is selected, then the document variables will remain blank on the generated document.
NOTE: Mandatory fields which may be hidden are required to be filled by the users.

-
Once the variable values are added, the user can Preview the document and choose to add Stamp, Text or Mask some content. Once reviewed with all the changes, users can send this document.
Approach 2 : Bulk Requests
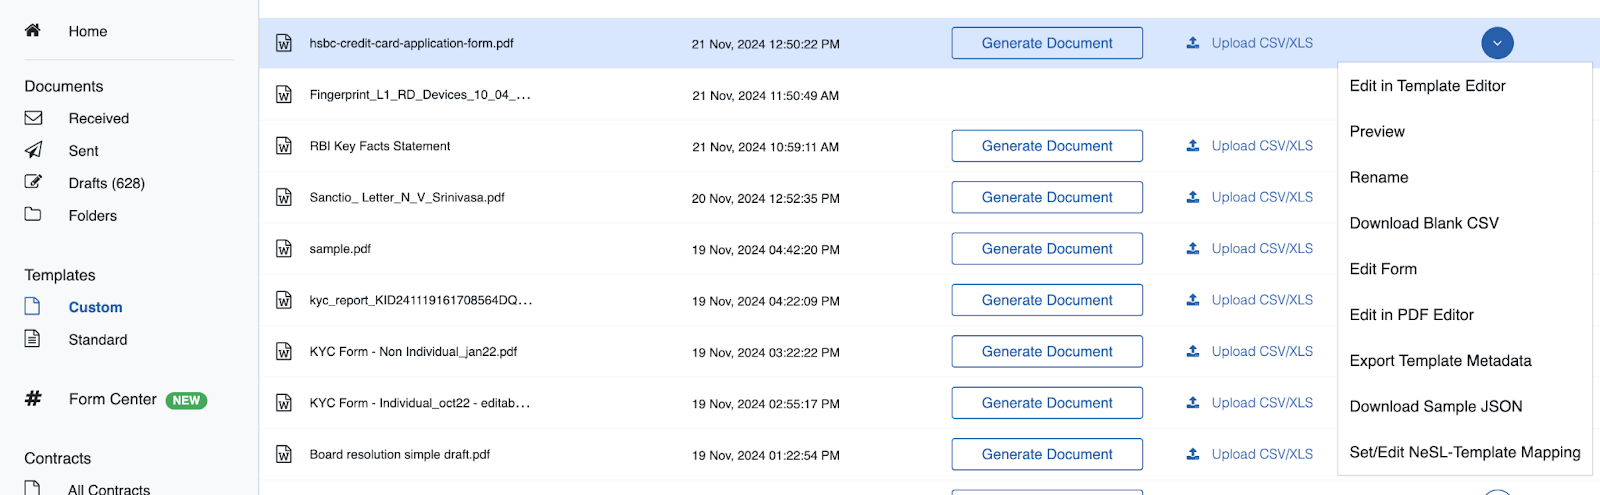
- To bulk send requests to customers, users need to click on the drop down option against the selected template and select the Download Blank CSV option.
- This will download a blank CSV file with respective headers that need to be input by the user.
First few columns would be the variables defined in the template until you see field with naming convention mentioned below:
| Name | Data to be filled | Examples |
|---|---|---|
| signer_1 | Signer email address or mobile number on which the sign link will be sent | Eg. abc@gmail.com / 9830098300. |
| sign_type_1 | Enter sign type either (aadhaar / electronic / electronic_certified / dsc / review) | - Aadhaar (for Aadhaar OTP based signatures) - Electronic (for slate/full name/initials/upload) - Electronic certified (for above type + counter signed by Digio) - DSC (for USB based token signatures) - Review (for no sign) |
| signer_name_1 | Enter the name of the signer here | Eg. John Doe |
| sequential | True / False | True - If you want to add sequencing to the signing, signer 1 will sign first then only signer 2 can sign the document False - If parallel signing |
| file_name | File name of the document | Eg. Onboarding Document |
| message | Pass any custom message for the signer to be sent on the email along with the signing link | Eg. Please eSign the Mutual NDA |
| estamp_tag | Input the eStamp tag in case the document needs stamp paper to be added | Refer eStamp Section |
| sign_within | Define the date by which the signer needs to sign | Default - 7 days |
- Once the downloaded CSV is filled, click on the Upload CSV/XLS option against the template.
- On successful upload, the requests can be seen under the Sent section of the dashboard.